


Installing a dash cam breaks down into two different tasks depending on what you want it to do.
Basic installation — plug the camera into your car's 12V power port, mount it on the windshield, and you're recording. Takes about ten minutes and works for everyday driving coverage.
Hardwire installation — connect the camera to your vehicle's electrical system so it stays powered when the ignition is off. Required for parking mode. Takes longer, needs a few more tools, and benefits from comfort with basic car DIY — or a quick trip to a shop.
This guide covers both, clearly separated so you can stop at whichever point covers your use case.
What You'll Need Before You Start
For basic installation
- The dash cam itself (with mount and adhesive pad)
- The included power cable (12V lighter plug)
- A cable-routing tool or a flathead screwdriver with electrical tape wrapped around the tip (for tucking cables into the headliner trim)
For hardwire installation (parking mode)
Everything above, plus:
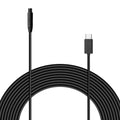
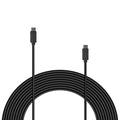
- A hardwire kit compatible with your dash cam — such as the REDTIGER OBD Hardwire Kit ($33.99, 10ft cable, converts 12V–24V vehicle power to 5V for the dash cam)
- The hardwire kit's included installation guide
- Basic comfort with routing cables through your vehicle's interior

Part 1: Basic Installation — Recording While Driving
This gets the camera recording in under 15 minutes.
Step 1 — Choose Your Mounting Location
Where to mount:
- Center of the windshield, just behind the rearview mirror — keeps the camera out of your field of vision and maximizes the front camera's view of the road
- Stay within the windshield's defroster or wiper sweep area so rain and condensation don't obstruct the lens
What to avoid:
- Behind a windshield tint band at the top of the glass — reduces image quality
- Directly in front of factory ADAS cameras (lane-keep assist, emergency braking) — check your vehicle manual if your car has these systems
- Any position that partially blocks your sightline as the driver
Step 2 — Clean the Windshield First
Adhesive mounts fail on a dirty or oily surface. Wipe the mounting spot with an alcohol wipe or residue-free glass cleaner. Let it fully dry before applying the mount.
Step 3 — Attach the Mount and Camera
- Peel the backing from the adhesive pad
- Press firmly against the cleaned glass for 30 seconds
- Attach the camera to the mount bracket
- Angle the lens straight down the road — use the live preview screen to confirm alignment before finalizing
Step 4 — Route the Power Cable
- Run the cable from the camera along the top of the windshield toward the A-pillar (the trim between windshield and front door)
- Tuck the cable behind the A-pillar trim using your routing tool — the trim typically pops out slightly and snaps back without tools
- Route down the A-pillar and along the bottom dash trim to the 12V port
- Leave a little slack at the camera end so the cable doesn't pull the mount if bumped
Step 5 — Plug In and Configure
- Plug the 12V end into your car's lighter/accessory port
- The camera powers on when the car starts
- Set the time and date, confirm loop recording is enabled, and run a quick test recording
At this point, you're done. The camera records while the car is on and stops when you turn off the ignition.

Part 2: Hardwire Installation — Enabling Parking Mode
Parking mode keeps the camera powered and recording after you park. Your 12V accessory port shuts off with the ignition — a hardwire kit is the only way to maintain continuous power while parked.
How a Hardwire Kit Works
A hardwire kit connects your dash cam directly to your vehicle's electrical system — to a circuit that stays live when the ignition is off. It converts the vehicle's 12V–24V power to the 5V the dash cam needs. Once connected, the camera can monitor for motion or impact around the clock.
REDTIGER's OBD Hardwire Kit handles the 12V-to-5V conversion and comes with an installation guide. Follow the kit's included instructions for your specific vehicle.
General Hardwire Process
- Route the power cable from the dash cam down the A-pillar toward the power connection point, tucking it as in Part 1
- Connect the hardwire kit following the kit's included installation guide — specifics vary by kit type and vehicle
- Enable parking mode in the dash cam's settings menu once the hardwire connection is confirmed
When to Use a Professional Installer
Consider having a shop do the hardwire if:
- You're not comfortable removing interior trim panels
- Your vehicle has complex electrical architecture (some hybrids and EVs require a different approach)
- You want a completely hidden cable run with no visible wiring
Most auto accessory shops can complete a basic dash cam hardwire in 30–60 minutes.
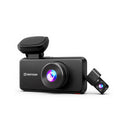
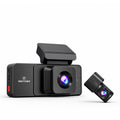
Which REDTIGER Cameras Include a Hardwire Kit
| Model | Hardwire Kit Included | Parking Mode |
|---|---|---|
| F7NA | Not included — purchase separately | 24-hour |
| F7NP | Not included — purchase separately | Time-lapse + collision |
| F17 | ✓ Included free | 24-hour |
| F17 Elite | ✓ Included free | NiteGuard™ 24-hour |
If your model doesn't include a hardwire kit, the REDTIGER OBD Hardwire Kit is $33.99. Confirm compatibility with your specific model on the product page before ordering.
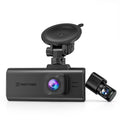
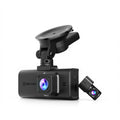
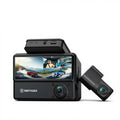
Rear Camera Installation (Front-and-Rear Systems)
If you're installing a dual-channel system, the rear camera adds one step: running a cable from the front unit to the rear windshield.
- Mount the rear camera on the inside of the rear windshield, centered, near the top edge — no drilling, no weather exposure
- Route the cable along the headliner (ceiling trim), down the C-pillar (rear corner trim), along the rear seat area, and forward to the front unit
- Tuck all cable runs into trim gaps using your routing tool
- The rear camera is powered by the front unit via this cable — no separate power connection needed
For a comparison of front-and-rear models, see our front and rear dash cam buying guide.
Frequently Asked Questions
Does a dash cam drain my car battery if left plugged in?
On basic installation using the 12V accessory port, no — the port shuts off with the ignition so the camera draws zero power when parked. On hardwire installation with parking mode enabled, the camera draws a small amount of power while parked. REDTIGER cameras include low-voltage cutoff protection that stops recording before the battery drops to a level that would prevent the engine from starting. Parking mode power draw over a typical overnight session is low enough for healthy batteries to handle without issue.
Can I install a dash cam myself, or do I need a professional?
Basic installation — windshield mount and 12V port connection — is DIY-friendly and most drivers complete it in under 15 minutes. Hardwire installation is more involved and depends on your comfort level removing car trim panels and working near vehicle wiring. If you are comfortable with basic car DIY, a quality hardwire kit with clear instructions is manageable. If not, a local car audio shop or auto accessory retailer can typically complete a hardwire install in under an hour.
Where should I mount my dash cam on the windshield?
The center of the windshield just behind the rearview mirror is the standard position. It keeps the camera out of your sightline, maximizes the front camera's field of view, and positions the lens where the wipers clear rain from the glass. Avoid the tinted band at the top of many windshields, and check your vehicle manual before mounting near any factory windshield cameras used for ADAS systems such as lane-keep assist or automatic emergency braking.
How long does dash cam installation take?
Basic installation takes 10 to 15 minutes. Hardwire installation typically takes 30 to 60 minutes for someone doing it for the first time, and less with experience. A professional shop can usually complete a hardwire install in 30 to 60 minutes.
My dash cam lost its date and time after I turned off the car. What's wrong?
Most dash cams store time settings using a small internal capacitor or battery. If the camera loses its time after every power-off, the internal charge may be depleted — reconnect the camera to power for several hours to recharge it. If the issue persists, contact REDTIGER support. Cameras with built-in GPS can automatically sync accurate time once a GPS lock is acquired — confirm that GPS logging is enabled in your camera settings.
Ready to enable parking mode?
The REDTIGER OBD Hardwire Kit adds 24-hour parking monitoring to compatible REDTIGER cameras. Or start with a camera that includes the kit free: the REDTIGER F17 Elite ships with the hardwire kit and NiteGuard™ parking mode ready to activate.
Get the REDTIGER OBD Hardwire Kit →

Leave a comment
All comments are moderated before being published.
This site is protected by hCaptcha and the hCaptcha Privacy Policy and Terms of Service apply.