


Dash Cam Setup That Works: Best Practices for Maximum Protection
|
|
Time to read 8 min

Help Center
Get help with setup, updates, and information

Track My Order
Check Your Package Tracking Status Online

Learn About Dash Cam
The Latest Dash Cam News and Information

Redtiger Player
Play the videos you've recorded on your PC

REDTIGER CAM APP
Download the Redtiger app and use it via a Wi-Fi connection
We provide comprehensive pre-sales and after-sales service.

Redtiger offers free shipping on orders totaling $50 or more. We recommend purchasing shipping protection to safeguard your package and money.

Redtiger offers a 30-day money-back guarantee. You may contact us for a no-questions-asked return within 30 days of receiving your order.

Ordering a dashcam through the Redtiger official website entitles you to an additional 6-month extended warranty. This brings the total warranty period to 24 months.

Redtiger provides 24/7 customer service. You can contact us via email or call our customer service hotline directly.
No need to worry about after-sales service—we provide comprehensive after-sales support.
We offer free shipping on qualifying orders with no hidden fees or surprise charges.
Most orders are processed within 1–2 business days and shipped through trusted carriers to ensure safe and timely delivery.
You’ll receive tracking details as soon as your order ships, so you can follow it every step of the way.
From checkout to delivery, we make the process simple and worry-free.

Your satisfaction comes first. If you’re not completely happy with your purchase, you can request a return within 30 days of delivery.
Simply reach out to our support team and we’ll guide you through the process.
Once your item is received and inspected, your refund will be issued promptly according to our policy.
Shop with confidence knowing your purchase is protected.

We use industry-standard encryption and trusted payment providers to protect every transaction.
Your personal and payment information is securely processed and never stored or shared without authorization.
Multiple secure payment options are available for your convenience, so you can complete your purchase with total confidence.

Have a question? We’re here to help.
Our dedicated customer support team responds quickly and provides clear, helpful solutions — whether it’s product guidance, order updates, or after-sales support.
We’re committed to delivering a smooth experience before and after your purchase.
|
|
Time to read 8 min
A proper dash cam setup is one of the smartest ways to protect yourself on the road. When your camera is configured correctly, it does more than just record your drive—it captures clear, reliable evidence when it matters most.
From powering on your device to fine-tuning recording and safety features, this guide walks you through everything you need to get your dash cam ready for everyday driving with confidence.
Table of contents
A proper dash cam setup involves more than just attaching the camera to your windshield. When you take the time to configure your dash cam correctly, it changes from a basic recorder into a dependable tool for your safety and security. It will capture clear video that you can use when it matters most. Taking a few minutes for a proper setup offers several key benefits.
A correct configuration confirms your camera records every drive without issues. This provides confidence that every moment is captured, so you do not miss an important event due to a settings mistake or a full memory card.
Optimizing the video settings means your recordings will be sharp and full of detail. You can read license plates and see road signs clearly. This level of detail is very important for evidence after an incident, whether it is day or night.
The best dash cam setup lets your camera operate automatically. It turns on, begins recording when your car starts, and protects important files if it detects an impact. This hands-free function means you never have to remember to start a recording.
Getting your dash cam working for the first time is a straightforward process. This initial stage is focused on giving the device power, getting the memory card ready, and finding the main menu. A smooth start will make the rest of the configuration feel much simpler.
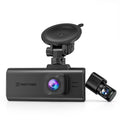
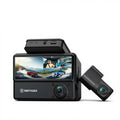
The first action in your how to setup dash cam journey is powering on your new device. Most dash cams include a car charger that fits into your vehicle's 12V power socket. You should connect the cable to your camera and then put the adapter into the socket. Your dash cam should turn on by itself when you start your car. If you plan to use features like parking mode, some dash cams may require a hardwire connection to your vehicle's fuse box for continuous power.
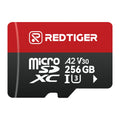
Your dash cam requires a memory card to save its video files. You should format the memory card inside the dash cam itself before you begin recording. The formatting process will erase any existing data on the card and prepare it specifically for your camera model. You can go to the system settings menu on your dash cam and look for the "Format" or "Format SD Card" option. Select this option and confirm you want to proceed.
Now that your camera is on and your memory card is formatted, you can look at the settings menu. You can get to the menu by pressing a button labeled "Menu" or "Settings" on the device. This is the area where you will customize the way your dash cam works. Take a little time to get to know the buttons and how to move through the different choices.
Getting familiar with your dash cam's menu ensures you capture every drive clearly and securely. Here's a breakdown of the main settings and what they do:
Adjust how your dash cam captures footage:
Control how your dash cam records:
Manage essential dash cam functions:
Access extra security and convenience features:
Adjusting your video settings is one of the most important parts of your dash cam setup. These settings have a direct effect on the quality and clarity of your video recordings. Clear video is needed to see details like license plates, street signs, and faces.
Resolution affects the amount of detail in your video. Higher resolutions like 2K or 4K capture more pixels, which gives you a sharper and clearer picture. A 1080P resolution, also known as Full HD, is fine for general driving. However, 4K offers the best clarity for reading license plates from farther away.
Frame rate is measured in frames per second (fps) and changes how smooth your video looks. A rate of 30fps is standard, but 60fps gives you smoother playback. This can be helpful when you analyze events that happen quickly. Bitrate controls how much data is in each second of video.
High Dynamic Range (HDR) and Wide Dynamic Range (WDR) are technologies that help your camera record in tricky light. A wdr dash cam setup is great for balancing a bright sky and dark shadows in the same picture.
After you get your video quality set, your next step is to choose how your dash cam records and saves video files. These settings make the recording process automatic, so you can just let it run. Smart features like loop recording and impact detection are at the heart of a modern dash cam setup.
Loop recording lets your dash cam record all the time. When the memory card fills up, it records over the oldest files. You can usually set the loop video length to 1, 3, or 5 minutes. A 3-minute setting offers a good balance.
The G-sensor is designed to feel sudden movements, like from a car accident or hard braking. When it is activated, it automatically locks the current video file so it cannot be recorded over. You can adjust how sensitive it is. A high setting might get triggered by potholes, while a low setting could miss a small bump.
Your dash cam can record audio inside your car as well. This could be helpful for recording conversations after an accident. However, you might want to turn it off for your privacy. The decision is up to you. Most dash cams give you a simple on/off option for the microphone in the settings menu, and some have a button for it.
It is very important to set the correct time and date on your dash cam. An accurate timestamp on your video provides a clear record of when something happened. This detail is very helpful for insurance claims and legal situations. Many dash cams also let you show other data on the screen, like your speed and GPS location.
Look for the "Date/Time" option in your system settings menu. Carefully set the current date and time. If your dash cam has GPS, it might be able to set the time for you, which is a very useful feature.
In the settings, you can decide if you want the date and time to appear on your recordings. It is a good idea to keep this feature turned on. A timestamp makes your video a more trustworthy piece of evidence.
If your dash cam includes a GPS module, you can show your driving speed and location on the video. This data gives a full picture of your drive and can be very helpful when you review the footage later.
To get the best performance from your device, you should look into the advanced features. These settings can make your car more secure and give you a better user experience.
In the Parking Mode menu, you can choose how your dash cam records while the car is parked:
Note: Parking mode requires a constant power supply, typically via a hardwire kit.
Many dash cams, like the ones from Redtiger, have Wi-Fi and a phone app. This connection lets you watch live video, download recordings, and adjust settings from your phone. It is a very simple way to manage your camera. Under the Wi-Fi menu, you can control how the dash cam connects to your phone:
Your dash cam's loop recording feature takes care of storage for you. Still, it is a good habit to format your memory card every so often to keep it working well. Some cameras even remind you to do this.
Following this dash cam setup guide helps turn your camera into a reliable road companion you can truly depend on. From choosing the right video quality to configuring advanced features like parking mode, a proper dash cam setup ensures your device works automatically and captures critical moments when they matter most. With a well-configured dash cam from a trusted brand such as Redtiger, you can drive with confidence knowing every drive is clearly and consistently recorded.
To set up your dash cam, you mount it, plug it in, format its memory card, and then adjust the resolution, loop recording, and G-sensor settings.
Yes, many new dash cams have Wi-Fi to connect to a smartphone app. This lets you see, download, and share your video files without any wires.
A loop recording length of 3 minutes is a very good choice. It creates video files that are easy to handle and does not fill your memory card with too many clips.

